

Starting seeds indoors doesn’t have to feel complicated. The goal isn’t “perfect seedlings” — it’s a simple routine that helps you stay consistent for a few weeks. Once you’ve got that routine, seed starting becomes one of the most satisfying parts of gardening.
This guide is a practical, checklist-style approach that keeps you moving forward without overwhelm.
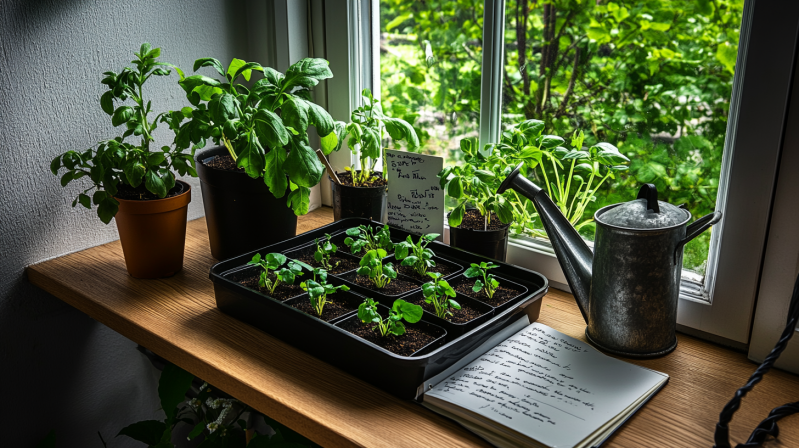
1) Start with the simple plan
Before you open a seed packet, decide three things:
- What you’re starting (pick 3–6 varieties to keep it manageable)
- Where they’ll live (a bright window can work, but a grow light makes it easier)
- How you’ll keep track (labels + a tiny set of notes)
Less guessing. More growing. That’s the whole vibe.
2) What you actually need (no fancy setup)
You can do this with a basic starter kit. Here’s the simple list:
Must-haves
- Seed trays or small pots (cell trays are easiest)
- Seed-starting mix (lighter than regular potting soil)
- A water spray bottle or small watering can
- Plant labels + a permanent marker
- A tray underneath to catch water
Nice-to-haves (makes it easier)
- A humidity dome or plastic wrap for the first few days
- A small fan nearby (helps prevent weak, leggy seedlings)
- A grow light (a big upgrade if you can swing it)
3) Timing that won’t make your head spin
A simple rule: start most seeds 6-8 weeks before your last expected frost date.
If you’re new, don’t try to start everything at once. Start with a few satisfying, forgiving choices:
- Tomatoes
- Peppers
- Basil
- A few flowers (like marigolds)
4) The no-fuss sowing method
Here’s the easiest way to plant seeds without overthinking:
- Fill cells/pots with moist seed-starting mix (damp like a wrung-out sponge).
- Make a small dip with your finger or pencil tip.
- Drop seeds in (usually 1-2 per cell).
- Cover lightly (most seeds don’t want to be buried deep).
- Label immediately (don’t skip this).
- Mist or water gently.
- Cover with a dome/plastic wrap until sprouting.
Label tip: write the plant name + date planted. That’s it.
5) The two big things that make seedlings succeed
Light
Most “seed starting problems” are actually light problems. As soon as seeds sprout, they need strong light. If you’re using a grow light, keep it a few inches above the seedlings and adjust as they grow.
Water
Overwatering is the #1 beginner mistake. Keep soil slightly moist, not soggy. Water from the bottom when possible (set the tray in shallow water for a few minutes, then remove).
6) The daily routine (the part that makes it easy)
This is the “no guessing” routine you’ll repeat:
Daily (2 minutes):
- Check moisture
- Check for sprouts
- Make sure light is on / seedlings are facing light
- Quick look for mold or droop
Every few days:
- Rotate trays (if using window light)
- Remove the humidity dome once most sprouts are up
- Give seedlings a little airflow (fan or cracked window)
7) Thinning and potting up (simple version)
When seedlings have their first true leaves (not the baby leaves), it’s time to thin:
- If you planted 2 seeds per cell, keep the strongest one.
- Snip the weaker one at soil level (don’t yank it out and disturb roots).
If roots fill the cell and the plant looks crowded, “pot up” to a slightly bigger container with potting mix.
8) Hardening off (don’t skip this)
Before planting outside, seedlings need a slow introduction to sun and wind.
Over 7 days:
- Day 1-2: 1-2 hours outside in shade
- Day 3-4: add more time + gentle morning sun
- Day 5-7: longer time + brighter light
Then they’re ready.
Quick Seed-Starting Checklist
- Choose 3-6 varieties
- Gather trays, mix, labels, marker
- Plant and label the same day
- Cover until sprouting
- Remove cover after sprouting
- Provide strong light daily
- Keep soil lightly moist (not soaked)
- Add airflow
- Thin to one seedling per cell
- Harden off before transplanting
Common problems (and quick fixes)
Leggy seedlings (tall + floppy): Not enough light — move closer to light or add a grow light.
Mold on soil: Too wet + no airflow — remove dome, add airflow, let the top dry slightly.
Seedlings falling over at the base: Could be damping off — reduce moisture, improve airflow, start fresh if severe.
Nothing germinating: Temp too cool or seeds too old — keep warmer, try a fresh batch.
What’s next
If you’re starting seeds this season, you’re already ahead of the game. Keep it simple, stay consistent, and don’t try to do everything at once.
We’ll be sharing more beginner-friendly tips on the blog as the season moves forward — including what to do after sprouting and how to transplant without stress.
Add comment
Comments